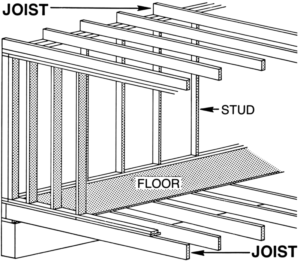
We’ve all walked on a wood floor that’s really squeaky and its quite annoying. Luckily its pretty easy to fix. I’ve been remodeling my basement over the past little while and took advantage of my basement ceiling being ripped open. My upstairs hardwood floor was pretty squeaky. You can’t really expect much else from a house built in the 1960’s. Since the ceiling in the basement was being insulated and an drywall put up, it was really easy to access the joists for the upstairs floor. It only takes a few steps. Here’s how you do it if you have access to a crawl space or from below the floor:
Needed Materials:
Pretty cheap tools for a good floor fix.
Step 1: Use a friend to help you locate squeaky spots
While you are below the squeaky floor, have a friend walk around until they find a squeaky area. Have them rock back an forth on the squeaky spot so you can pinpoint the area from below. If you need a little extra help, have your friend knock on the floor. This makes it easier to hear and, if you need to, feel where the squeak is located.
Step 2: Shim the joists

Put a little carpenters glue on the top of the skinny end of a shim and slip it between the floor joist and the sub-flooring where the squeak is occurring. Give it a few taps with your hammer, but don’t push it in too far. Pushing it in too far can raise the floor in other areas and cause more squeaks or other problems. It make take a few shims in an area depending on how much the floor moves.
Step 3: Repeat
Repeat steps 1 and 2 until you’ve eliminated all the squeaky spot.
Congratulations, enjoy your squeak free floor! (Note: You can’t eliminate every single sound your floor makes. As it ages, little pops and creaks are unavoidable. This is for fixing the loud squeaks.)
If you don’t have access to underneath the floor, here’s an instructional video from This Old House: